
Piezography Ink Install Instructions for the Epson® Stylus Pro 7600 & 9600 Printers
How to install and use Piezography ink on the 7600 & 9600.
Summary
Use these procedures to convert your color printer to a Piezography printer. If you are installing user refillable cartridges, please refer to the installation instructions provided with the refillable cartridges. Whether you use refillable cartridges, CIS, or pre-filled cartridges (available outside the USA), the placement of the shades of Piezography ink are critical and not arbitrary. You must refer to the shade location table provided here on this document. A Piezography system depends upon software with which to control the ink shades. Installation instructions and support of that software is provided by the manufacturers of those software. We provide our own guides to our suggested use of QuadTone RIP, so that you can get the best results from that product.
Printer Testing
Verify that your printer functions perfectly with Epson inks before installing Piezography inks. In addition to printing a perfect nozzle check, make certain that the printer does not have unfixable banding problems by making test prints. Take the time to scrutinize your printer’s performance before the next step. It is not possible to diagnose many printing problems on a printer that has not first been tested with Epson inks. Ideally you should also align your print-head for UniDirectional printing before switching to Piezography inks.
If you are having problems with your printer or print-head, please look at our detailed instructions on how to clean your print head.
Use of flush cartridges with the 7600 / 9600 printer
The use of flush cartridges is suggested when switching to Piezography Neutral K7 inks from a non-Epson or non-Piezography ink set, or if you have been experiencing clogging problems with your current ink set. Otherwise, the actual Piezography K7 inks can be used to “flush” out the pre-existing color inks from your printer. If you do not use flush carts, you may need to print some additional media before all traces of color ink have been removed.
Items needed to have on hand when changing inks
A set of ink cartridges; a set of flush cartridges (if used); an eighth cartridge, either ink or flush fluid for the Photo Black slot; a spare maintenance tank (available through Epson), or a large format cartridge and waste tank chip resetter; The black position “draining” cartridge that came with your printer may be needed, depending on your situation (see below).
Note about the maintenance tank: Instead of replacing a full maintenance tank, you may use a large format chip resetter to reset your maintenance tank chip to read empty. It is safe to reset the maintenance tank chip one time; if you wish to do it more than once, periodically check the waste ink level in the tank, to ensure that it does not overfill with waste ink. It is possible to dis-assemble the maintenance tank and replace the filling with some absorbent material. Chip resetters are available on-line. Be sure to purchase one specifically for large format Epson printers
Ink change procedure steps
Background on the 7600 and 7600 printers and black position cartridges: Two separate cycles are needed to switch inks in these printers. The required cycle depends on the type of black cartridge you are switching from and the type of black cartridge you are switching to.
If you are switching from a Photo black to matte black cartridge, or from a matte black to Photo black cartridge, you must use a black ink change cycle. If you are switching from a matte black to a matte black cartridge, or from a Photo black to a Photo black cartridge, you must use an initial fill cycle.
If you use flush cartridges as part of the process, you need to use two flush cycles. They may both be the same type or they may be different, depending on the chips on the black cartridges involved.
Before proceeding, you must determine which types of black cartridges you have. Refer to Table 1, below, for an explanation of the types of chips on each of the different black position cartridges available for these printers.
| Table 1: Explanation of the chips found on different black position cartridges | |
| Black ink or flush cartridge description | Type |
| Epson Photo Black | PHOTO |
| Epson Matte Black | MATTE |
| Flush cartridge for 7600/9600 printers | PHOTO or MATTE* |
| Piezotone Portfolio Black | PHOTO |
| Piezotone Museum Black | MATTE |
| Piezography K7, Shade #1 | MATTE |
*The flush cartridges supplied for these printers may either be chipped as Matte Black or as Photo Black. The cartridge will be clearly labeled as to the type of black chip.
Use the following steps to switch from your original ink set, to flush cartridges, if used, to the final ink cartridges.
1. Test your printer with Epson inks, and have the proper equipment on hand (see Part I for details).
2. Determine the ink change steps you need to follow, to change the inks in your printer:
Refer to Table 2 (below) to determine which ink change steps to follow, based on the types of black position cartridges you have. Follow the ink change steps shown in this table for your situation.
| Table 2: Ink change steps needed for different types of black position cartridges. | |||
| Changing FROM cartridge type: | Changing TO cartridge type: | Flush cartridge used? | Perform the following steps: |
| PHOTO | PHOTO | PHOTO | 1. “Initial Fill” 2. “Initial Fill” |
| PHOTO | PHOTO | MATTE | 1. “Black Ink Change” 2. “Black Ink Change” |
| PHOTO | PHOTO | Not Used | 1. “Initial Fill” |
| MATTE | MATTE | PHOTO | 1. “Black Ink Change” 2. “Black Ink Change” |
| MATTE | MATTE | MATTE | 1. “Initial Fill” 2. “Initial Fill” |
| MATTE | MATTE | Not Used | 1. “Initial Fill” |
| PHOTO | MATTE | PHOTO | 1. “Initial Fill” 2. “Black Ink Change” |
| PHOTO | MATTE | MATTE | 1. “Black Ink Change” 2. “Initial Fill” |
| PHOTO | MATTE | Not Used | 1. “Black Ink Change” |
| MATTE | PHOTO | PHOTO | 1. “Black Ink Change” 2. “Initial Fill” |
| MATTE | PHOTO | MATTE | 1. “Initial Fill” 2. “Black Ink Change” |
| MATTE | PHOTO | Not Used | 1. “Black Ink Change” |
3. Perform Ink Change Steps. Use the information from Table 2 to determine which ink change step or steps you must use. If you need to use two ink change steps, use them in the order mentioned in Table 2.
Used when switching from a PHOTO to MATTE or MATTE to PHOTO black ink or flush fluid cartridge
- Turn the printer on. On the printer’s control panel, push the Select Type/Right Arrow button once so the printer LCD screen shows “Printer Setup.”
- Scroll the Down Arrow button until you see “Maintenance.”
- Press the Right Arrow button once, then the Down Arrow button once, so the LCD screen reads “Bk. Ink Change” (Black Ink Change).
- Push the Right Arrow button, so the LCD screen reads “Exec” Push the Enter/Cut-Eject button.
- Raise the cartridge ink lever, and remove all seven cartridges from the printer.
- Install only the black drain cartridge in position #1 and lower the ink cartridge lever. The printer will drain all the ink out of the tubes and the print head.
- After the cycle completes, raise the ink cartridge lever, remove the black drain cartridge, and install the set of seven ink or flush cartridges.
- Lock the ink cartridge lever. The printer will begin to charge with ink or flush fluid. The LCD screen will display “Ready” when done.
- If you have just installed the new ink set in the printer, verify that you have a perfect nozzle check pattern, and then you may begin printing.
- If you have just filled the printer with flush fluid, if possible, turn the printer off for several hours, overnight, or longer, to allow the flush fluid to dissolve any residual ink in the tubes.
Used when switching from a MATTE to MATTE or PHOTO to PHOTO black ink or flush fluid cartridge
- Turn the printer off, remove the installed cartridges and replace them with the next set.
- Turn the printer on while holding down the following three buttons: Paper Feed Up, Paper Feed Down and Cut Eject. The printer will start up in the “Check Menu.”
- Scroll through the list to the “Cleaning” section. Press the Enter/Cut-Eject button.
- Scroll through the cleaning list to “init. fill” (initial fill). Press the Enter/Cut-Eject button. The printer will flush out the old set of inks or flush fluid, refilling with the new set.
- Turn the printer off to exit the “check menu.”
- If you have just installed the new ink set in the printer turn the printer back on, verify that you have a perfect nozzle check pattern, and then you may begin printing.
- If you have just filled the printer with flush fluid, it is beneficial to leave the printer off for several hours, or overnight, or longer, to allow the flush fluid to dissolve any remaining ink in the tubes and print head.
Important Note: Do not rely on the “automatic” nozzle check cycle when running Piezography K7 inks. The printer does not recognize the ink densities of the patterns and will determine the print head is clogged, even if it is not. Use the “manual” nozzle check cycle instead.
Epson Pro 7600 & 9600 Specs & Ink Placement Chart
Ink Options:
1) Piezography K7 (matte only) *
2) Piezography K6 (gloss only) **
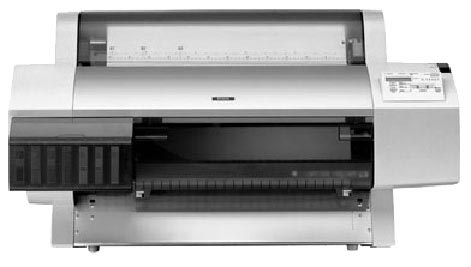
Printer Specs & Review:
The Epson 7600 and 9600 ushered in the revolution in digital printmaking starting in 2003. No other machine has changed photography so much. The machines are still in operation today and many people use them for Piezography. We suggest you only buy a 7600 or 9600 that is in perfect operating condition. It's not worth the time and effort to resusitate this machine from the dead for Piezography. You can get a 9800 or 9880 (pressurized) printer for the same price most likely. Support is limited for this printer but if you have on that works well keep it! The printheads have a very long life and print at 2880x1440 dpi.
Ink Placement Chart:
|
Cartridge Position |
1) Piezography K7: Matte |
2) Piezography K6: Gloss |
|
Black |
UltraHD Matte Black |
HD Photo Black |
|
Light Black |
Shade #6 |
Shade #6 |
|
Cyan |
Shade #2 |
Shade #2 |
|
Magenta |
Shade #4 |
Shade #4 |
|
Light Cyan |
Shade #3 |
Shade #3 |
|
Light Magenta |
Shade #5 |
Shade #5 |
|
Yellow |
Shade #7 |
Gloss Overprint (for gloss printing) |
|
NOTES |
* Use “K7” matte curves |
** Use “K6” gloss curves |
Storage of previously used ink cartridges
You may wish to remove and save one or more cartridges that you have removed from your printer, for use in the future. If you want to store your cartridges for later use, place the removed cartridges in plastic bags, close the bags tightly to minimize ink evaporation, and place the cartridges in a box so that they sit upright, as they do when they are in the printer. Storing a previously opened cartridge on its side or upside down will allow ink to leak out of the air vent holes. We recommend taping over the vent holes to prevent evaporation. Many of our ink cartridge (large and small) come with vent-hole plugs. Make sure to place these vent-hole plugs back into the cartridge before storage. Make sure to remember to remove them when you want to use the cartridge again though!
Note: On small format cartridges, it is very important that you do not allow ink to touch the air inlet filter. Make sure your cartridges remain upright at all times.
Getting started with Piezography printing and QuadtoneRIP.
Now that you have your inks installed, you must print your images through QuadToneRIP shareware software. It is not possible to achieve good results without using QuadToneRIP. Go here to download and install QuadtoneRIP for Mac or PC.
We provide a comprehensive user manual for Piezography along with a set of pre-made curves "profiles" for use with QuadtoneRIP and various fine-art inkjet papers. After installing QuadtoneRIP make sure to ask download and install our free Community Edition set of curves and documentation. This will guide you through the process of installing your Piezograhy printer on both Windows and Mac operating systems so you can print.
Supported Papers
We support an ever evolving list of fine art inkjet papers. You can see the list of officially supported papers here. Please note that this list is new as of 2016 and we have not yet updated every curve for every inkset and every printer and every paper (over 1500 different curves). This will take some time. Many curves work perfectly for a vast amount of differently branded papers. The Hahnemuhle Photo Rag curve (for example) will work just fine on Moab Entrada Rag. If you do not see your paper listed in the pre-made set of curves available from the Piezography Community Edition download, experiment by using a curve made for a similar paper.
Technical Support
We provide free technical support at our forum at http://inkjetmall.com/tech. We also provide direct paid phone support at inkjetmall. Before requesting support please register on our forum and also look through all of the support documents on our Piezography Knowledge Base web page.
Frequently Asked Questions
You may find it very helpful to view our F.A.Q. section for Piezography. This will tell you a lot!